Clear Ice

For some time, clear ice has been a thing for fancy cocktails. Besides looking pretty cool, the only advantage to them is that they take longer to melt, keeping your drink cool longer without watering it down as fast. They’re great for boozy sipping cocktails and I try to keep them around anytime I have the space in my freezer to make them.
If you look online, there’s some advice for boiling distilled water before freezing it. I don’t think it’s advantageous in any way to do this since I haven’t had any noticeable difference in the results. The only thing I do is run my water through a brita filter to make it taste a little better than tap water.
Take a small cooler, I have a 5 quart one, and you rip off the top. Some people try to time it so it’s frozen just enough so the air bubbles don’t form just yet and while this saves one cut, I usually have far too much to juggle in my life to try and time this and to always schedule this timing. In the end, you still need to temper the ice before cutting or chiseling. So for me, I just freeze it all the way through.
Once the ice block is tempered and ready to work with, I think it’s pretty meditative and relaxing to do this. I’ve seen some setups where people prop silicon molds inside the cooler so the clear ice forms inside these molds. Then you can just unmold the cubes without cutting them much. Sure they’re cleaner, but it takes the fun out of carving it yourself. I think it’s a good practice to do something that will not be perfect. I won’t master this since I won’t dedicate a lot of time to it, but unlike most cooking where you can go back to fix or cover up mistakes, carving ice is something that you can’t hide behind.
I also have a bunch of different sized glasses. So depending on what I want, I prefer to just carve the ice myself for what I need.
INSTRUCTIONS:
Take a 5 quart cooler and remove the top. Rinse on the inside to make sure it is clean.
Run water through a brita filter and fill the cooler about 4/5 of the way full. (Water expands when it freezes so that’s why I don’t fill it to the top.)
Freeze overnight until it is completely frozen.
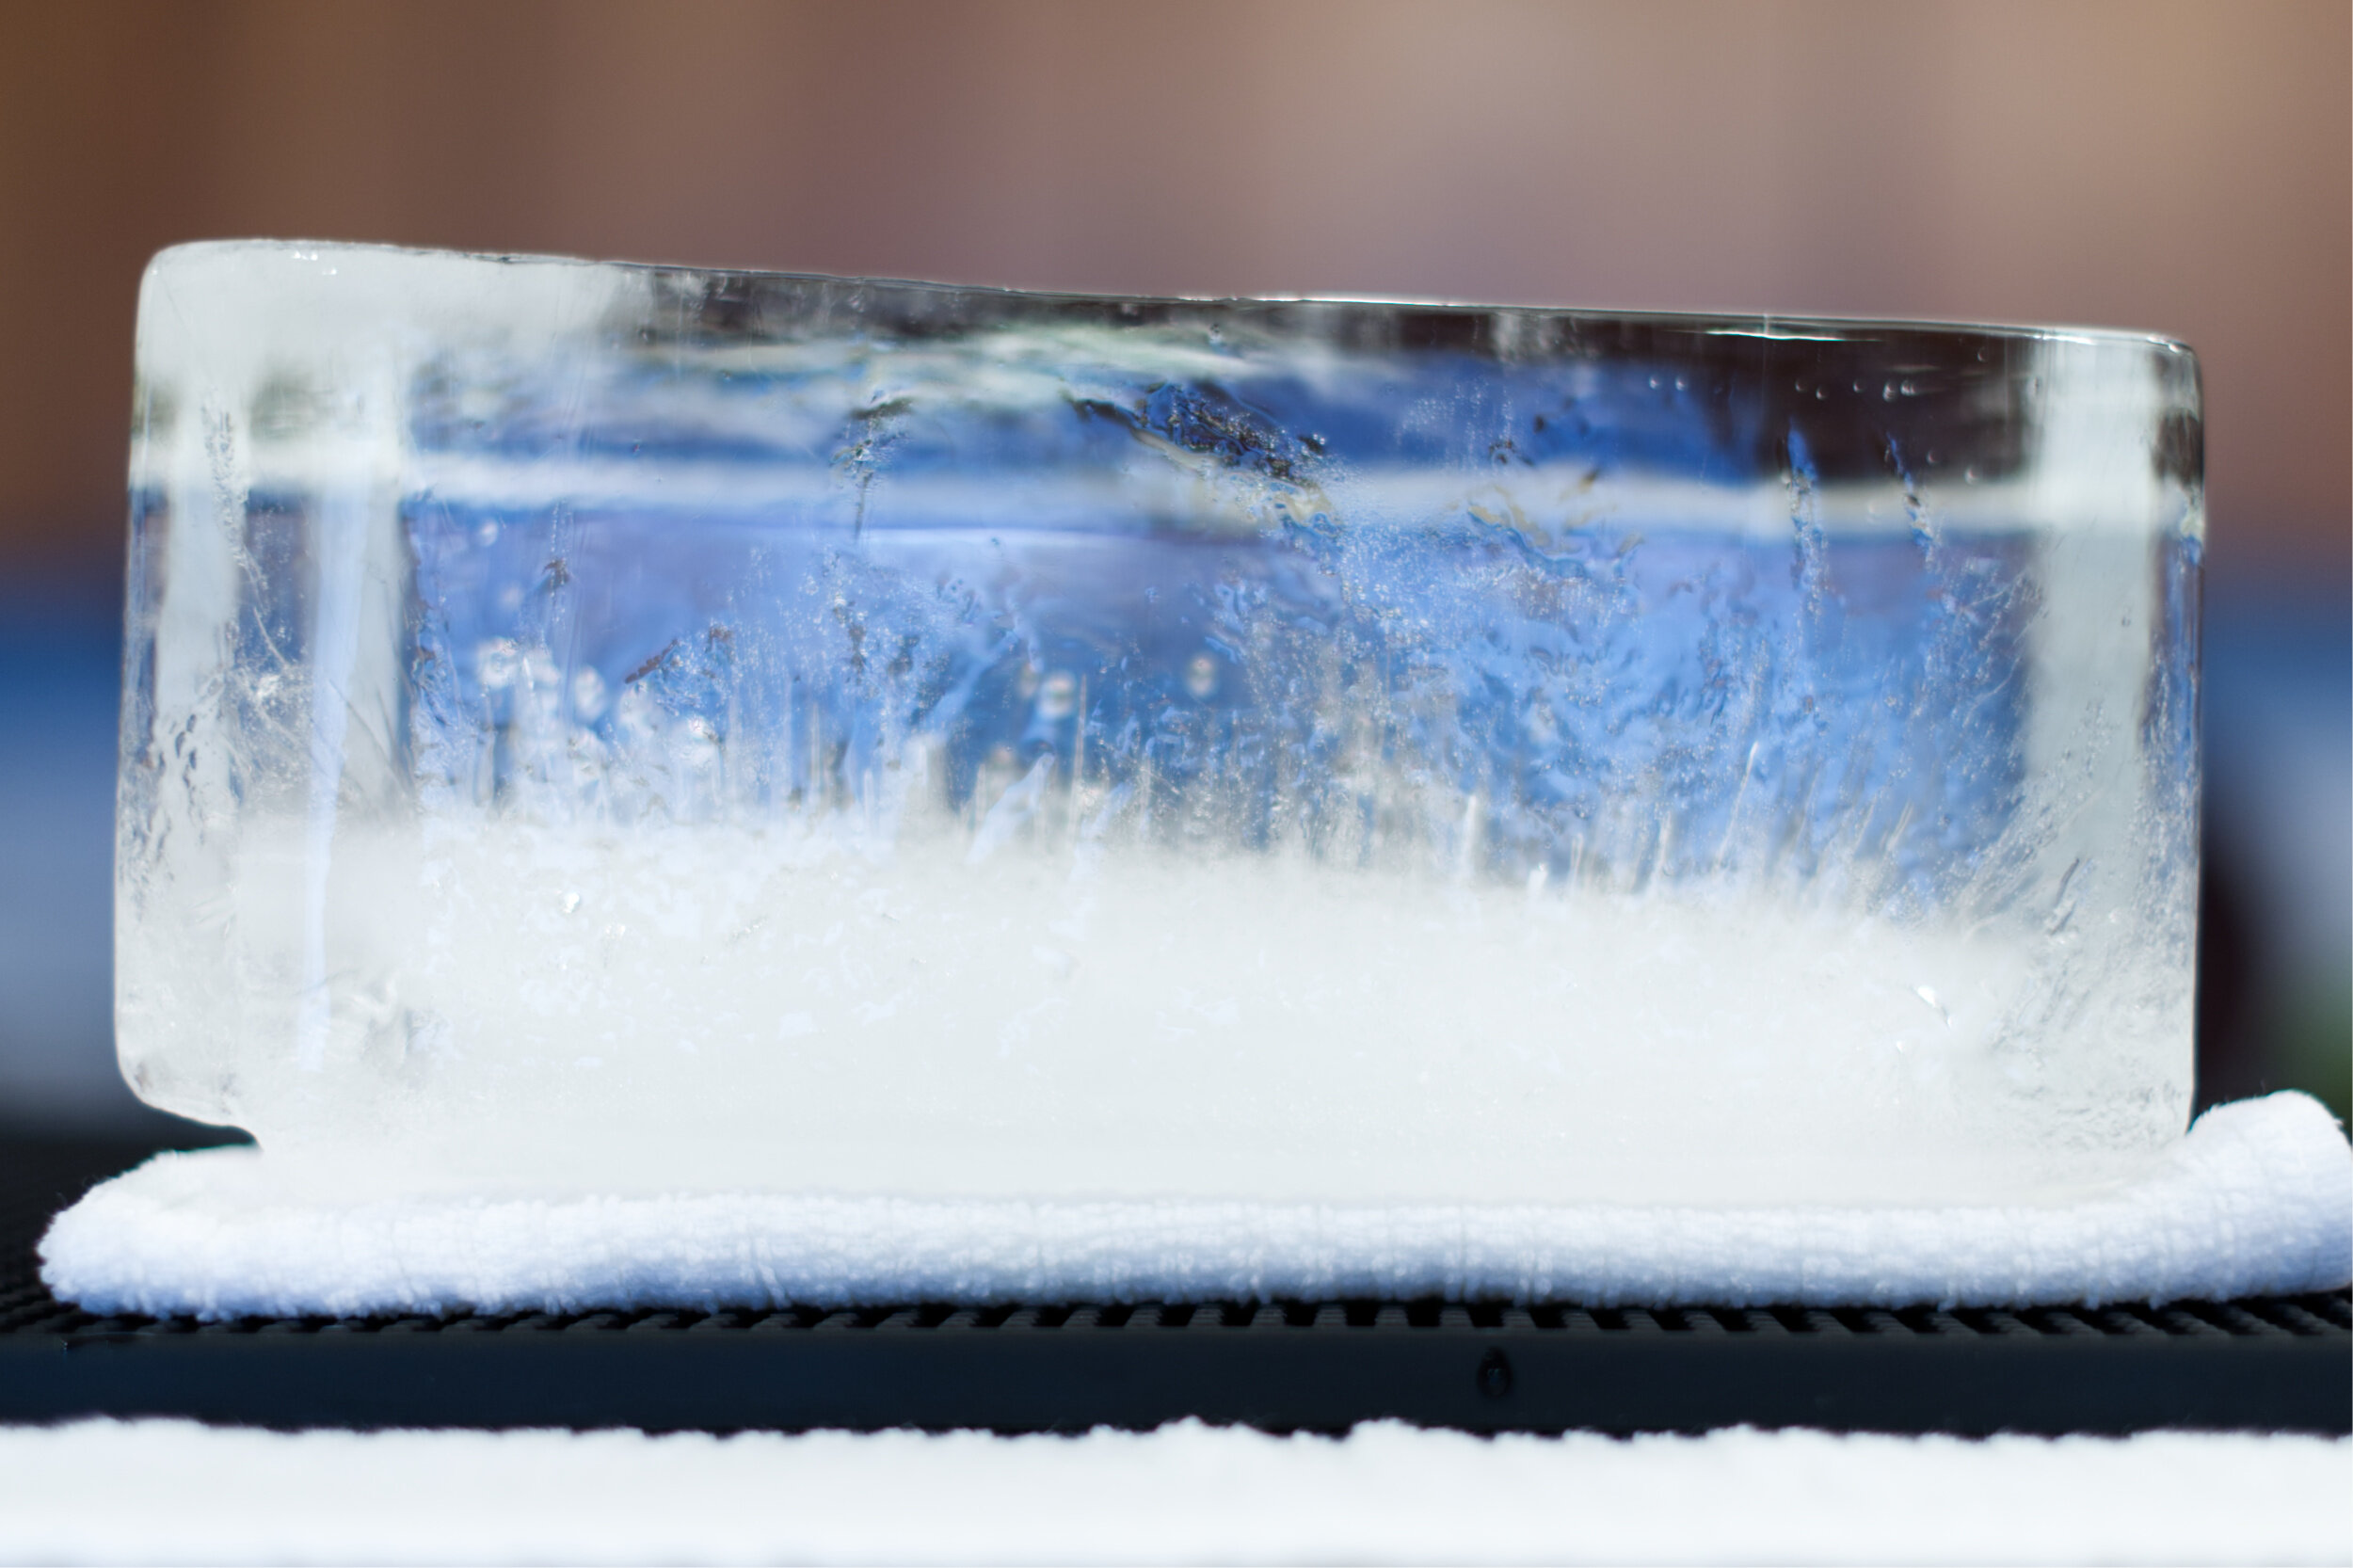
Temper by setting this out at room temperature for about an hour. About 15-20 minutes of the way through, you should be able to unmold the ice block from the cooler. You will see that most of the super tiny cloudy ice bubbles are on one half of the ice block.
Leave this to temper on a bar mat or towel to catch water. You will need to periodically get rid of this water. It’s better to leave the cloudy side touching whatever you set it on as heat transfer from some of the surface of whatever you set it on will melt a little faster than the air.
For a 5 quart cooler, I temper my ice block for 1 hour. Leaving it out at room temperature so it won’t shatter as much and it’s easier to carve.
Once the ice block is tempered, it shouldn’t have any frost on the outside as the ice block should start to slowly melt.
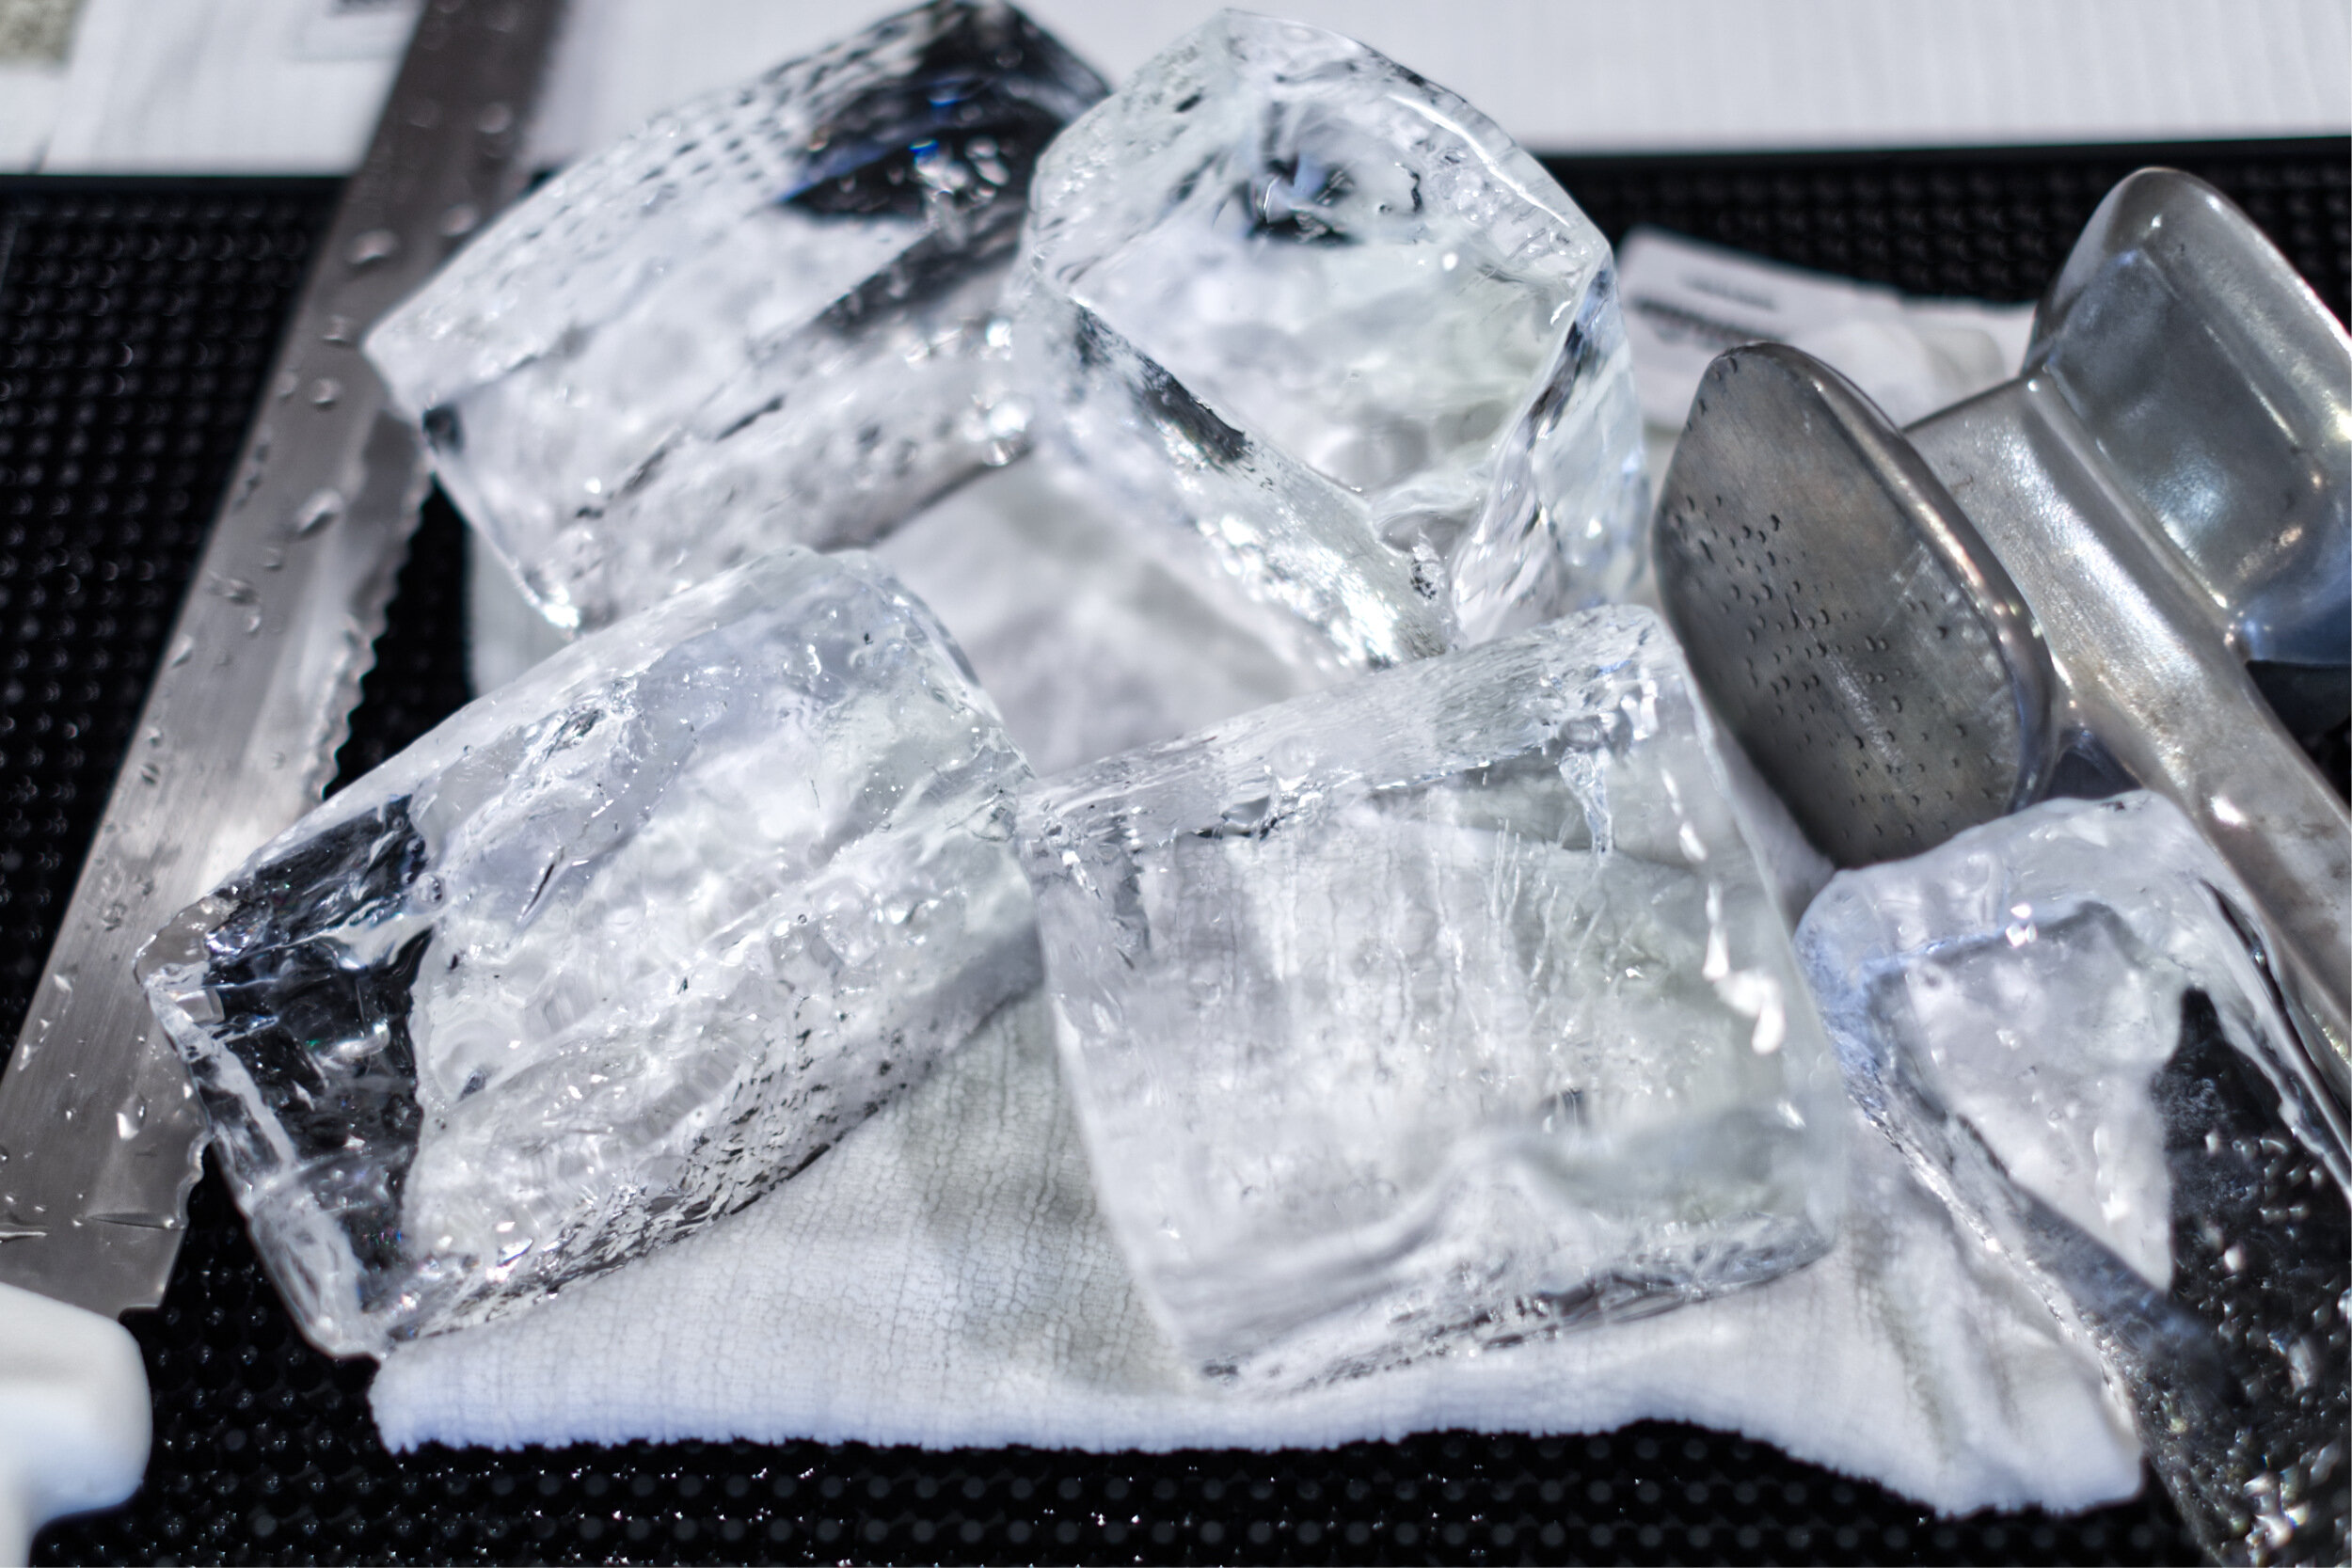
Using a serrated knife, carve a channel to split the ice block in half (using whatever side that is shorter to begin with). The channel should be about 1/4 to 1/2 inch thick so the blade is securely in the block. Use a mallet and confidently strike the back of the blade and the block should split pretty evenly.
Repeat this step to cut down the ice block as well as tossing the cloudy ice.
When you get to a shape that you want (cube or rectangle), you can use the knife to shave of edges or an ice pick to continue to shape it. If the block you have is still too large for the glass that you want, you can run it under cold water on all sides to melt it quickly.
If you are saving these, they’re best kept in a ziploc bag in the freezer and as you need them, temper them at room temperature for about 5-10 minutes before adding a cocktail to the drink so the clear ice doesn’t crack.